

사용한 개발환경
* Spring_Boot 3.2.1
* Maria_db 8.xx (RDBMS)
* Mybatis (Frame_Work)
* LomBok
* JAVA 17
* React App 생성
cd src/main
npx create-react-app {프로젝트명}

위와 같이 리액트 앱이 실행되는 모습이 보인다. 나는 3000번 포트가 이미 사용중이어서 3001번으로 실행하였다. 아마 여러분은 localhost:3000으로 실행되었을 것이다.
프로젝트 연동
여기까지 잘 따라왔다면 React와 Spring Boot의 프로젝트가 각각 3000번과 8080번 포트에서 수행되는 모습까지 확인했을 것이다. 그렇다면 이제 두 프로젝트를 연동시켜보자.
⚡️ Proxy 설정
기본적으로 React 프로젝트는 3000번 포트에서 작동되기 때문에 CORS 관련한 오류를 방지하기 위해서 Proxy를 설정해주어야 한다.
CORS 오류와 관련된 내용을 간단히 설명하자면 동일출처에서 데이터 요청을 하지 않았기 때문에 발생하는 오류이다. React와 Spring은 localhost라는 ip는 같지만 포트번호가 다르기 때문에 동일 출처로 판단하지 않아서 발생하는 오류이다.
이러한 부분을 방지하기 위해 Proxy 설정을 해보자.
//미들웨어 설치
npm install http-proxy-middleware --save
설치가 완료되었으면 다음경로에 setupProxy.js 파일을 생성하고 아래 코드를 작성한다.
//경로
src/main/fronted/src/setupProxy.js

const { createProxyMiddleware } = require('http-proxy-middleware');

module.exports = function(app) {
  app.use(
    '/api',
    createProxyMiddleware({
      target: 'http://localhost:8080',	// 서버 URL or localhost:설정한포트번호
      changeOrigin: true,
    })
  );
};
이렇게 설정을 완료하였으면 '/api'로 요청을 보내게되면, Spring 서버로 요청이 도착하게 된다.
⚡️ 통신 테스트
이제 프론트(React)와 백엔드(Spring)의 통신이 정상적으로 이루어지는지 테스트를 수행할 예정이다. 테스트에 사용 될 라이브러리는 Axios이다.
// Axios 설치
npm install axios --save설치가 완료되면 아래 코드를 App.js에 작성해주자.
import {useEffect, useState} from "react";
import axios from "axios";

function App() {
    const [hello, setHello] = useState('');

    useEffect(() => {
        axios.get('/api/test')
            .then((res) => {
                setHello(res.data);
            })
    }, []);
    return (
        <div className="App">
            백엔드 데이터 : {hello}
        </div>
    );
}

export default App;
다음으로는 Spring으로 이동하여 Controller를 생성하고 아래 코드를 작성하자.
package com.www.react;

import org.springframework.stereotype.Controller;
import org.springframework.web.bind.annotation.GetMapping;
import org.springframework.web.bind.annotation.RestController;

@RestController
public class HelloCotroller {

   @GetMapping("/api/test")
    public String hello() {
       return "테스트";
   }

}

이제 두개의 프로젝트를 시작해보겠다. 먼저 Spring을 가동시켜주고 React를 가동시켜보자.

두 프로젝트 모두 잘 동작하는 모습을 볼 수 있다.
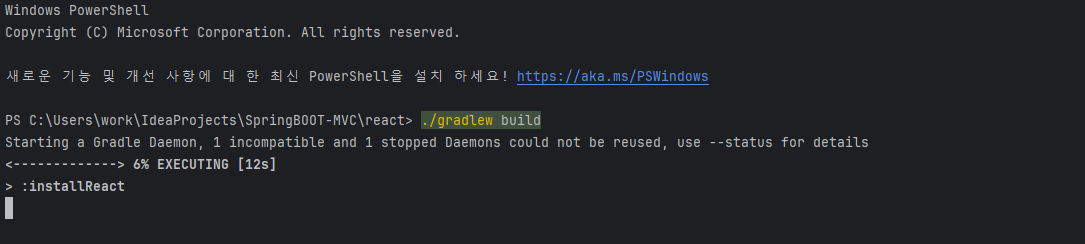
⚡️ 빌드
이제 모든 설정 및 테스트가 끝났으니 빌드 후 배포했을 때 잘 동작하는지 알아보자. 참고로 개발환경과 배포 환경은 다른 경우들이 많기 때문에 배포를해서 정상적으로 작동하는지 먼저 확인하고 개발을 시작하는 것이 좋다.
공들여서 개발을 다 해놨는데 배포 단계에서 갈아엎는 경우들이 생긴다. 물론 초보라서 이런 실수를 하는 것이지만 이 글을 읽는 분들은 대부분이 나와 같은 초보라는 생각을 하기 때문에 노파심에 강조를 한번하고 넘어가겠다.
build.gradle 파일에 하단 코드를 추가하자.
def frontendDir = "$projectDir/src/main/frontend"

sourceSets {
	main {
		resources { srcDirs = ["$projectDir/src/main/resources"]
		}
	}
}

processResources { dependsOn "copyReactBuildFiles" }

task installReact(type: Exec) {
	workingDir "$frontendDir"
	inputs.dir "$frontendDir"
	group = BasePlugin.BUILD_GROUP
	if (System.getProperty('os.name').toLowerCase(Locale.ROOT).contains('windows')) {
		commandLine "npm.cmd", "audit", "fix"
		commandLine 'npm.cmd', 'install' }
	else {
		commandLine "npm", "audit", "fix" commandLine 'npm', 'install'
	}
}

task buildReact(type: Exec) {
	dependsOn "installReact"
	workingDir "$frontendDir"
	inputs.dir "$frontendDir"
	group = BasePlugin.BUILD_GROUP
	if (System.getProperty('os.name').toLowerCase(Locale.ROOT).contains('windows')) {
		commandLine "npm.cmd", "run-script", "build"
	} else {
		commandLine "npm", "run-script", "build"
	}
}

task copyReactBuildFiles(type: Copy) {
	dependsOn "buildReact"
	from "$frontendDir/build"
	into "$projectDir/src/main/resources/static"
}

위 사진을 보면 포트번호가 8080으로 바뀌어져 있는 모습을 볼 수 있습니다. 이제 개발을 하고 다시 빌드를 하면 정상적으로 어플리케이션을 배포 할 수 있습니다.
'기존 > 🐳React' 카테고리의 다른 글
| [React] Header component 사용하기 (1) | 2023.12.23 |
|---|---|
| [React] Button component 사용하기 (0) | 2023.12.23 |
| [React] process.env.PUBLIC_URL 설정 (0) | 2023.12.23 |
| [React] react-router 응용편, Path Variable, Query String (0) | 2023.12.23 |
| [React] react-router 설치 및 세팅 (0) | 2023.12.23 |